Wednesday, 26 August 2015

A Glance To Use The Status Bar In Word

A Glance To Use The Status Bar In Word

In this article, we're explaining you the options of Status Bar and how to customize it to best suit the way you work and improve your productivity.

The Status Bar, for MS Word, is available at the bottom of the word document window, which displays the information of your document, such as what page you are currently viewing, how many words are in your document, whether any proofing errors were found and etc.,
 

The Status Bar can be easily customized by adding more information to or removing information from it.

To do this, right-click anywhere on the Status Bar. Items that have check marks next to them display on the Status Bar. These items may not display at all times, depending on the current circumstances. For instance, if you’re not sharing the document with other authors, “Number of Authors Editing” will not display on the Status Bar even if you have selected it in the “Customize Status Bar” popup menu.

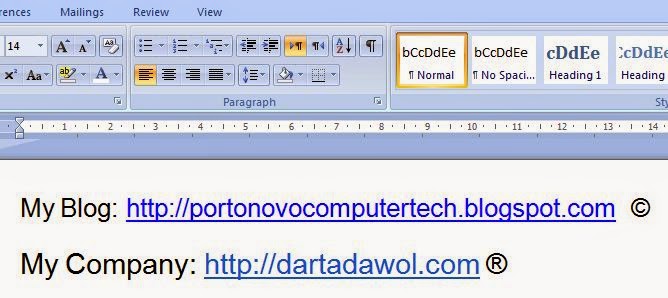
Additional information, regarding different parts, of your document displays in the Status Bar. For instance, when hover your mouse over a hyperlink ...... 
....... the URL to the hyperlink will be displayed in the Status Bar.

Further, if you copy and paste the content from a webpage onto a Word document, then you hover your mouse over that pasted image, the URL for that image will also be displayed in the Status Bar.
NOTE: You can press “Ctrl” and click on a hyperlink to open the link in a browser window and also avoid automatically creating hyperlinks.

The icons on right side of the Status Bar provide information such as Print Layout, Full Screen Reading, Web Layout, Outline or Draft and the Zoom Level as they allow you to change, how you are using Word. 

Friday, 21 August 2015

Windows: How To Get & Use Special Characters

(215) Windows: How To Get & Use Special Characters

Many special characters (those not on the standard computer keyboard) are useful, and sometimes necessary to our work. This article describes few methods to get and entering such characters.

The character map in Windows is a feature that can help us to insert the required special characters to our work. 
 
To access the Character Map in Vista or Windows 7, just click on START and type character map into the search box then press Enter.

Choose the font, which matches to your work, then choose the special character you want to use.
Now, just paste the character into your form, or whatever application you likely to use.
 

An another way to navigate the same through Start Menu. 
Start > All Programs > Accessories > System Tools > Character Map.

Here's a quick way to pull it up is just type charmap or charmap.exe into the Run box. This feature may help to those new to Windows or perhaps some users, who have forgotten it. 

Thursday, 14 May 2015

How To Troubleshoot Mozilla Firefox Crashes

(218) How To Troubleshoot Mozilla Firefox Crashes   

Web browsers are designed with complicated pieces of software, which interacting with lots of other software on your system, such as extensions, themes, plug-ins, security programs, graphics drivers, and much more. Incompatibilities or out-of-date software may often cause crashes.  
Firefox may also crash for a variety of reasons, and you can quickly fix most crashes with it’s Safe Mode and Troubleshoot info page. However, these tricks wouldn’t fix every crash. 

The Safe Mode will load Firefox without loading the Add-ons. To activate Safe Mode, click on Help then choose Restart with Add-ons Disabled. You may also activate Safe Mode by holding Shift key while starting Firefox.  
Try Safe Mode for a while, if Firefox is crashing. If Safe Mode works properly, then assume the problem is with one of your Add-ons. So, you may have to leave Safe Mode then disable Add-ons one-by-one until you identify the Add-on, which causing the problem. But do not waste your time by going, one-by-one, through the steps to identify the exact cause; instead, go to technical information page then solve the problems.

Firefox creates a technical information page to the user, where it stores the technical data, which is useful to solve problems. All the tech info will be revealed in this page. To get the technical information page, Menu > Help (then click) Troubleshooting Information.

From Troubleshooting Information page, you can reset Firefox browser by click the button Refresh Firefox. This will remove your Add-ons and customization then restore browser settings to its default. 

Now Firefox will create a new troubleshooting info page and migrating your old info such as bookmarks, browsing history, cookies, auto-fill info and saved passwords. But you will lose your extensions, themes, site-specific preferences and search engines, when you refresh Firefox. 

In particular, Firefox extensions and themes could cause crashes; so, get rid of them. 

If Firefox crashes, again, after re-install your favorite extensions, then there might be one of your extension is likely causing the crashes. Try re-installing extensions one-by-one and identify the particular extension, which causing problem, and remove it. 

Firefox has hardware acceleration feature, which take care of your computer's graphics card to render text and objects on web pages. It speeds-up web page rendering and manages some load off CPU. So, hardware acceleration may also cause problems with graphic drivers and graphic cards. Try to disable this feature, for a time being, if you face crashing.  

To disable hardware acceleration Tools > (click) Options > (choose) Advanced (tab) > General (tab, then remove the tick mark from) Use hardware acceleration when available > (then press) OK.

If Firefox works normally, without crashing, then assume hardware acceleration was likely the problem. Try to update graphic drivers and they may fix the problems. Note that you should not disable hardware acceleration, if everything works properly, as this is a useful feature. 

Malware may also cause Firefox to crash, as malware can cause other programs to crash on your system. If you face regular crashing, then scan your computer with an antivirus program that you already have on your system or download from Microsoft Security Essentials

Mozilla recommends to update your system's software, if Firefox is crashing. Below list of everything should have to be updated:
1. Firefox browser has to be updated in a frequent manner. To make update: Help > (click) About Firefox. Download available updates and install.
2. Plug-ins: Visit the Firefox plug-in update check page, where the page will scan the browser for outdated Plug-ins. Follow the links to download and install updates for any outdated plugins.


3. Extensions and Themes: Tools > (click) Add-ons (and select) Extensions. (Click) Gear (box, and select) Check for Updates. Install any updated Add-ons.
4. Windows: Use Windows Update to ensure Windows is up-to-date. 
5. Graphics Drivers: Install updated graphics drivers to fix problems with hardware acceleration. 
6. Internet Security Software: Install the latest versions of any firewalls, antivirus programs, Internet security suites, and other security applications installed on your system. 

System's hardware problems may also cause Firefox and other software to crash. Try checking your computer’s RAM for errors if crashes continue to occur.

Thursday, 9 April 2015

Windows: How To Disable The Start-Up Programs

(217) Windows: How To Disable The Start-Up Programs

Obviously you already know, 'how to disable the start-up programs; but this article is meant for everybody and feel free to share with your non-techie friends! 

The more software that installed on your system, the longer it may seem to take to start-up Windows. Many programs add themselves in the program list then started itself, when you boot the computer.  

A smart way is to run few required programs, such as anti-virus and firewall software, with Windows, when your system is booting-up. But the other programs that were running at boot-up is just wasting of resources and extending the start-up time.   

Windows 8 or 8.1just open Task Manager by right click the Task Bar (or press and hold Ctrl + Shift + Esc, a shortcut key) and click on More Details, switching to Start-Up tab then use Disable button.  
It's really a simple process and if these options are not showing-up then click More details, which will be in the same place of Fewer details.  

Windows 7, Vista, or XP A tool MSConfig, is installed with Windows 7, Vista and XP, which allows you to view the running programs at start-up and disable them as per your need. Aware that MSConfig can also be used to configure several other things; so, be careful when using it. To run MSConfig, open Start Menu then type msconfig.exe in the search box and Enter.
Now System Configuration's main Window will be opened. Click the Start-up tab, where you see all the start-up programs with a check box next to each one. To prevent a program from starting up, just tick the check box next to the desired program then click OK.
A dialog box displays and asking to restart your computer for the changes to took effect. Click Restart button to restart the computer.

If you are using XP, Start > Run, type msconfig.exe in edit box, then click OK.  

CCleaner: If you're using the free PC cleaning utility CCleaner, which has a tool to (view and) disable the start-up programs.

To view the list of start-up programs, just open CCleaner, then Tools > Start-up.
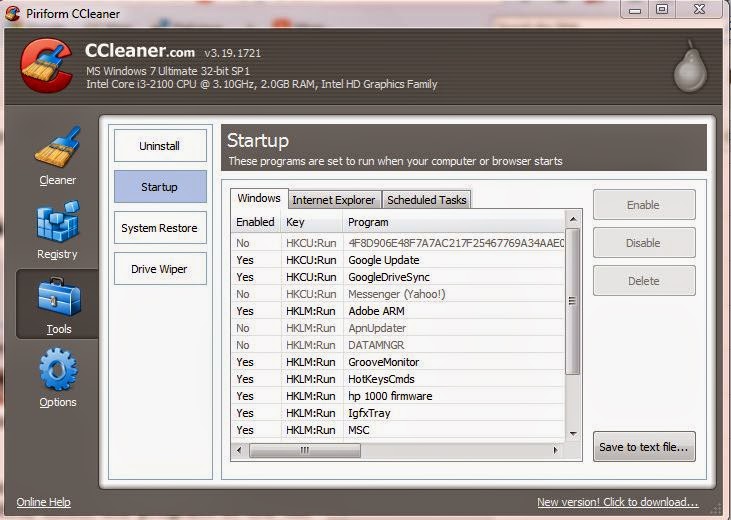
The Enabled column indicates whether each program is set to start with Windows. To disable a program that is enabled, select the program in the list and click Disable. You can also enable programs that have been disabled. And CCleaner doesn't prompt you to restart the computer for the changes you made; so you've to do by yourself.

And some applications need to be configured to stop launching themselves when the computer boots, or they will just add themselves into the list of start-up programs again. In this case, there is usually a setting in program’s options to prevent it from starting with Windows.

Sunday, 5 April 2015

How to Type The Special Characters Faster on Any Computer, Smartphone, or Tablet

(216) How to Type The Special Characters Faster on Any Computer, Smartphone, or Tablet  

Most characters that you want to type doesn't appeared on your keyboard whether you're using a physical keyboard or a touch one. And perhaps you could always do a search online to find the symbol then copy, paste it into your application. This is inefficient way, but works quickly to insert when you need it occasionally. 

This article will explain 'how you can type them faster on your computer as well as mobile devices'.  

On Windows, using 'Alt key + number keystrokes' will allow you to insert special characters, but these require an attached numerical keypad on the right of your keyboard, and they wouldn't available on most of the laptops. So, they'll only work on desktops, where the keyboard should have the number pad at the right side along with enter key. 

To get special characters just press and hold Alt key then tap the appropriate numbers using number pad at the right side of your keyboard and release the Alt key. And ensure 'Num Lock' to be on (just tap 'Num Lock' key to turn it on).

For instance, you want to get the symbol £, for British Pound, just press and hold Alt key then tap the numbers 0163, which is numerical keystrokes for British Pound, and then release the Alt key. The symbol £ will be appeared. 

To know the keystrokes for each special character, just open Character Map and click over any character, where it reveals the keystroke, such as Alt+0174 for ®, at the bottom right corner of the Character Map Window. You may also use the Character Map Window, directly, to view the keystroke codes, by click on the characters, and copy then paste into your applications. The list of keystroke codes for the special characters is also available online. 

When using Android's keyboard, just long press the keys to access the related characters and symbols. For instance, long press the key, e, and view the accented e characters. The same process took effect, too, when long press other symbols, such as for currency, to access the additional related symbols. 

This is by default and Google Keyboard App works for Android. Android offers in supporting more keyboards and you may install them from Google Play where you need to type a variety of Unicode symbols. 

When using iPhone or iPad, you may get many additional characters by long press the appropriate key. To type the word touché, you should type touch, then long press the key e and choose the character é. The same process works for a variety of symbols, and for instance you may get the desired currency by long press the $ symbol on the keyboard then choose the desired one. 

To add a new keyboard for different languages, just go to Settings > General > Keyboards > Add New Keyboard. The iOS is offering support for third-party keyboards, where you may install keyboards for a variety of Unicode symbols. 

When using Mac OS X, which has it's own Character Viewer and easier to access. Click Edit menu, on any application that you're working, and choose Special Characters to view it. Locate the desired symbol, from the Window, and double-click on it to enter into the text field on your current application. 

If you're using special characters, frequently, then add them in Favorite List to access them easily, when you need. The list is well organized than Windows OS. 

You may also type a lot of accented letters, and other special characters using Option key. For instance, if you want to type the word touché, first you've to type touch, then press Option key along with e, together. Now tap the e key, which instructs your Mac to use an acute accent letter for e. 

And Washington State University did a good job to Mac users by providing a list of Option and Option+Shift shortcuts, where you may find then type special characters. 

There is no single standard method for typing the Unicode characters on Linux, which depends on the applications and the graphical tool-kit.

Monday, 23 March 2015

10 Things should be kept in mind while buying a Pocket Wi-Fi Router

10 Things should be kept in mind while buying a Pocket Wi-Fi Router

Internet, today, becomes a travel companion with every possible gadget is Wi-Fi enabled. However when you're traveling in a group and need connectivity on-the-go, it's best to use a Wi-Fi router and create a hotspot to connect multiple devices at one-go! 


A Pocket Wi-Fi Router is a portable - small sized device, with Wi-Fi Hotspot capability. You can connect this device to an Internet source and make it a Wi-Fi hotspot, which allows multiple devices to connect to the internet. Many of these devices are small sized and so easy to carry wherever you go!

In the market, different types of pocket Wi-Fi devices available with different capabilities. So, you may choose depending on your budget and, you can go for a minimum functionality device or really, a fancy device with lots of option. 

And before buying a Pocket Wi-Fi Router, 10 things should have to keep in mind: 

1. Data Plans: Several data plans are offered, by Internet Service Provider (ISP), under prepaid and postpaid.  So, check the data plans, which is suitable for you; because ISP offering the router at a very cheap price but the data plan will be expensive. 

2. Locked / Unlocked: It's one of the most important factor and have to know whether the device is locked to a specific ISP or not. A locked device can only be worked to a specific ISP and unable to use with any other ISP. If you're getting a device very cheap, then there will be very high possibilities that the router is locked to an ISP. The best choice, to investing your money, is an unlocked one, which allows to change your ISP whenever you need. 

3. How many devices able to connect at a time: Most routers has capacity to connect five devices at a time, which seem to be reasonable. But depending on your usage, for instance - a big family or a small office, you may choose the routers that allow higher number of connections. 

4. Compatibility of ISP: Keep in mind, every ISP doesn't have coverage signals in all areas, and every wireless router wouldn't be compatible with every ISP. So, check well before buying a portable wireless router whether it is compatible with your SIM, data-card and the ISP through where you're going to spent most of the time. 

5. Data Card supporting (3G/4G): To enjoying high speed Internet, ensure the pocket Wi-Fi router, which you're going to buy, supports 3G/4G Data Card.        

6. Wi-Fi Speed: Before buying a wireless router, you've to check its wireless speed standards, too. The standards are ranged as - 'b', 'g' and 'n'.
'n' is the next generation technology, which is newer and supports faster speed, with a maximum net data rate from 54 Mbit/s to 600 Mbit/s and operates on both 2.4 GHz and 5 GHz bands. 
'g' gives, even, a better coverage and its wireless signal seems to be stronger around the house, which has a maximum data rate 54 Mbit/s or an average of 22 Mbit/s, with 2.4 GHz band.   
'b' has a maximum data rate 11 Mbit/s and, operating in 2.4 GHz band.

7. Router comes with Power Bank: The routers, nowadays, equipped with power bank, where you may getting an advantage of an inbuilt powerful battery, which not only gives continuous working time without the need of charge but allows to charging your smartphones on-the-go, too. 

8. Quick Start: It's also essential to know 'how quickly the router booting- up!'.  The booting time may vary from few seconds to few minutes. So, choose the routers that should get access to net in just 5 seconds without hassles of installation of drivers or software. 

9. Mobile Apps should be managed: Mobile Apps are more convenient, which simplifying one's net-life, today. So, the same should be accessible over the data connection, where the routers allow the users to download Android Apps and to manage anytime, anywhere. So the users could able to view their data usage, battery life and etc., The App is available on Google's Play Store for free of charge.  

10. USB 2.0 Ports: Some routers are coming with USB 2.0 Ports, which can  be great to the users, because they're helpful to share files with the connected computers.

Tuesday, 8 July 2014

Everything You Need To Know About SD Card

Everything You Need To Know About SD Card

The Memory, SD (Secure Digital), Cards are used to store and share data in various electronic devices such as smartphones, tablets, laptops, digital cameras and even music players. But they're manufactured in different speed classes, capacities and sizes; so, different devices are requiring different types of SD cards.
 
In this article we're going to explain the differences; so, you'll get an idea 'how to choose an SD card for your device'. 

Speed Class Rating: An SD card's speed is calculated by how quickly the information can be read from, or written to, the card. Earlier the speed was specified in 'times' rating then it was superseded by Speed Class Rating. The newer SD cards are improved the speed by increasing bus rate and offering different speeds. 

The standard speed classes are defined by SD Association, a developer and publisher for SD Card technology. The manufacturers use “speed classes” to measure the speed of an SD card.  

10, 6, 4, and 2 are the four different speed classes where class 10 is the fastest, and 2 is the slowest. Class 2, the slowest, is suitable for standard definition video recording, while classes 4 and 6 are suitable for high-definition video recording. Class 10, the fastest, is suitable for full HD video recording, and HD still consecutive recording.  

There are also two Ultra High Speed (UHS) classes, but they’re more expensive and they've designed for professional uses to the devices, which support UHS. 

Here's the associated logos, in order from slowest to fastest:
For typical usage, like smartphone, tablet or digital camera, a class 4 or class 6 SD card is better and class 10 cards are for ideal usage, when shooting high-resolution videos or RAW photos. Class 2 cards are a bit of slow sides on these days; so, it's better to avoid to buy, even they're cheap in price. 

An SD card's speed class can be identified from the card itself and they're indicated clearly on the cards as in below pictures, the left SD card is class 4 and, right is 6.
You may also get the speed class from online store during purchase or on the package when buying from any shop. 

If an SD card doesn't exist speed class symbol then assume, it's class is 0 (zero), which were designed and introduced before the speed class rating system. They were, of course, slower than a class 2 card.  

Physical size: As mentioned earlier, different devices need different types of SD cards. So, SD cards are manufactured in three different sizes. They are: Standard, Mini and Micro SD. 

Standard SD cards are the largest, measuring 32x24x2.1 mm and weighing less than two grams. Most of the digital cameras still using standard SD cards. They have the standard “cut corner”  design. 

Mini SD cards are smaller than Standard SD cards, measuring 21.5x20x1.4 mm and weighing about 0.8 grams. This is the least common size today and these cards were designed especially for mobile phones.

Micro SD cards are the smallest size, measuring 11x15x1 mm and weighing just 0.25 grams. These cards are used in cell phones and smartphones including tablets. 

Storage Capacity: The SD cards are manufactured in different storage capacities, like system's hard drives, and flash memory.


The below chart will give a brief report on Micro and Mini SD cards.
But the standard (SD) cards are 1 MB to 2 GB in capacity or perhaps 4 GB, but they're non-standard. 

The standard SDHC (Secure Digital High Capacity), version 2.0, was announced in January 2006 with capacity 2 GB to 32 GB.

The standard Secure Digital eXtended Capacity (SDXC) was announced in January 2009 with version 3.01 and supports cards 32 GB to 2 TB in capacity. 

Ultra High Speed (UHS) bus, version 3.0, is introduced to both SDHC and SDXC cards, with interface speeds from 50 Mbyte/s to 104 Mbyte/s for 4-bit UHS-I bus and version 4.0, to the same, is also introduced in June 2011, allows speeds of 156 Mbyte/s to 312 Mbyte/s over 4-lane UHS-II bus, which requires an additional row of physical pins. 

Reformatting SD cards may change its cluster size, make writes less efficient and do slower or shorten it's lifespan. 

Fake SD cards are commonly found in the markets as they're mislabeled and counterfeited that reported a fake capacity and run slower than labeled.  

The pictured, at left, Samsung Pro 64GB Micro SDXC (front and back) is original and the falsification is at right, which announced even 64GB, but exist only 8GB capacity with Class 4 speed can be usable
So, when buying an SD card, you should have to know the right speed class, size and capacity. It's better to check what the device supports and consider what speed and capacity you actually need.